How do I change the name of a project?
There are a few different ways you can change a project's name. Learn more by following the instructions below.
Option 1: "Projects" tab within the Building Profile
Step 1: Hover your mouse over the project line, you will see three dots appear, as shown in the image below.
Step 2: Click on the three-dotted icon.
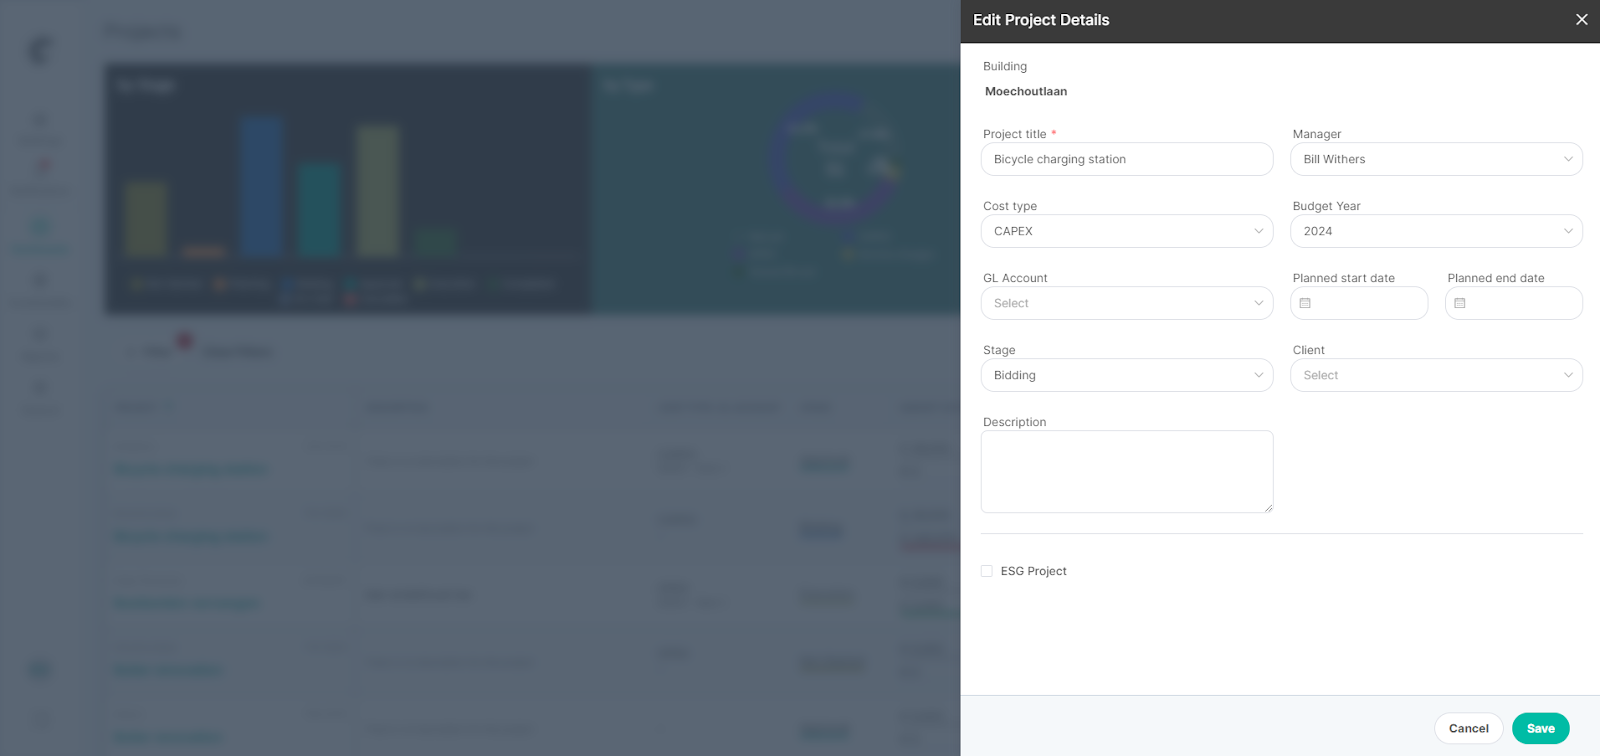
Step 3: Select "Edit Project" and a sidebar will appear on the right side of the screen.
Step 4: Edit the name and any other sections you might need to change.
Step 5: Save your changes.
Option 2: Projects Dashboard
Step 1: Hover your mouse over the Dashboards’ icon on the menu to the left of your screen.
Step 2: Select "Projects."
Step 3: Hover over the project line and click on the three-dotted icon.
Step 4: Click on the option "Edit Project."
Step 5: A sidebar will appear on the right-hand side of the screen, and you can go ahead and edit the name or any other sections you might want to change.
Option 3: Project page
Step 1: You can get to the project page, clicking on the Project’s name either from within the Building Profile or through the Projects dashboard.
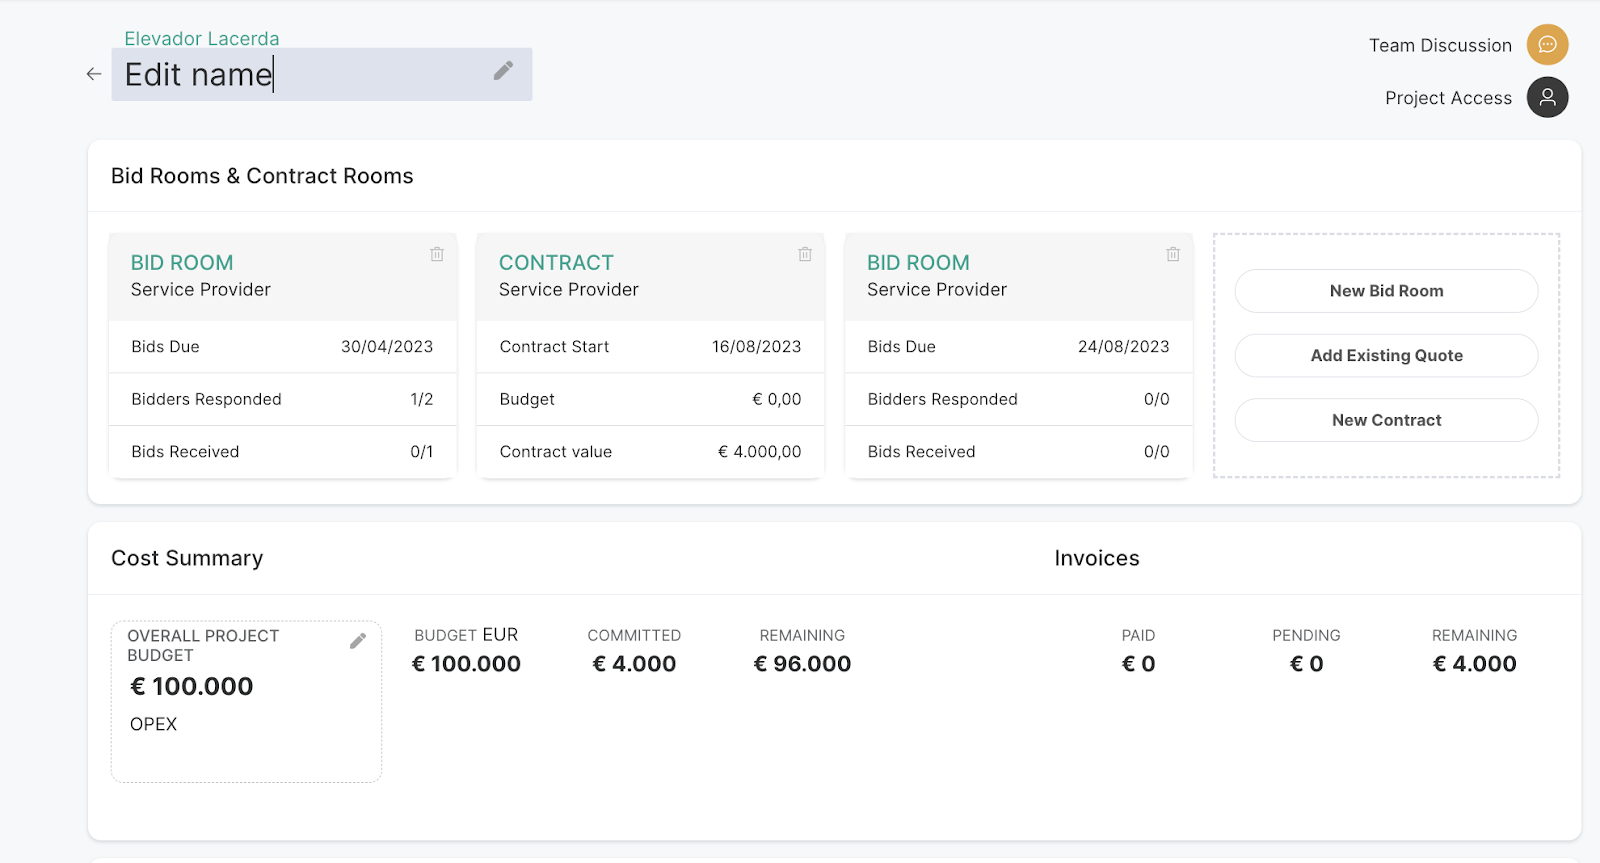
Step 2: Once there, the project title should have a pencil icon right next to it, indicating it is editable.
Step 3: Click on the pencil icon and rename the project.
Related Articles
How do I change a project's stage?
If you want to change the stage a project is in, follow the steps below. Step 1: Go to the Projects tab in the Building Profile. Step 2: If you hover your mouse over the name or anywhere on the project line, you will see three dots appear, as shown ...I can't see a specific project
If you're unable to view a particular project, it’s likely because your permissions aren’t set correctly. To fix this, follow the steps below in Company Settings: Option 1: Change Role Step 1: In the Company Settings section, go to the Team or ...How can I change the property manager?
To change the property manager, follow the steps below. Step 1: When you first log in, click on the building you want to make changes to, and you will be redirected to the building profile. Step 2: Starting on the left-hand side of your screen, you ...How can I change an asset's address?
Follow the steps below to learn how to change an asset's address. Step 1: When you first log in, click on the building you want to edit, and you will be redirected to the building profile. Step 2: On the right-hand side of your screen, you should see ...How do I access a project?
It is possible to access a project via the building profile or the projects' dashboard. Learn more below. Option 1: How to Access a Project via the Building Profile Step 1: Select the asset you want to manage on the asset list. Step 2: Go to the ...